Tuesday, October 26, 2010

Chicken and Broccoli Alfredo

Don’t get me wrong. I love buttery, creamy, delicious alfredo sauce. But my love handles don’t. My mom clipped this recipe out of a magazine when she was visiting after the kiddo was born, and it’s really great. It’s not all that original, but it’s really yummy, plus, it’s lower in fat. It’s also very, very easy to make.

Again, don’t be put off by the whole milk in the recipe. We get it with WIC for the kiddo, but we have so much of it that I use it once in a while in recipes. It really doesn’t add that much fat per serving, and helps it to stay creamy since I’m not using butter or cream. If we have it in the house, I occasionally add a little bit of whipping cream, but not usually. I’ve never tried this recipe with skim milk, but if you do, let me know how it turns out.
Chicken and Broccoli Alfredo

2 ½ cups chopped broccoli (more or less if you want)
2 cups uncooked whole-wheat penne pasta
salt
1 lb chicken breast, cubed - season with garlic and onion powder, salt, pepper, and oregano
½ cup chopped onion
1 tbsp olive oil
1 can cream of mushroom soup
1 cup whole milk
¾ cup parmesan cheese
½ tsp white pepper
few shakes of salt
bit of nutmeg and cinnamon (very little bit)

Cook pasta in pot of salted boiling water. Once the pasta is almost tender, add broccoli, and boil until tender. The whole wheat pasta usually takes just a bit longer to cook, and since we give this to the kiddo, I like the pasta and the broccoli to be just a little more tender.
Drain the pasta and broccoli and then return to pot (off of heat). Add a bit of olive oil and cover to keep warm. Pour the olive oil onto the wooden spoon before drizzling it over, so you don’t use too much.

Saute chicken and onion in olive oil until chicken is tender.
Add all sauce ingredients to the pan. Combine and heat until slightly thickened. Add more cheese if desired, or more milk.
Pour sauce into pot of pasta and broccoli and combine, then serve.
I think almost every time I make this I mess with the sauce, adding a little more of this or that, or a lot more of this or that if I make a bigger batch. Feel free to mess with it and make it your own. We usually serve this with a big Ceasar salad, and it makes a great meal.

Sunday, October 24, 2010

White Bean Soup

I COMPLETELY forgot to take pictures of this one today, and I’m so mad! We had some friends over for dinner today, and I was rushing a little bit to get it done.

This is one of our absolute favorite meals, and it’s perfect for the rainy, blustery, cold days of fall and winter (just like today). It also makes quite a bit, so we can have it twice more. I put some in the freezer this time, to see if it freezes well, and I will report back when I know.

Don’t be put off by the whipping cream and sour cream - I put this recipe in our calorie counter, and it is actually pretty good for you. Yay! And be sure to use a large enough pot.
White Bean Chili

1 lb chicken breast, cubed and seasoned with salt, pepper, garlic and onion powder
1 medium onion, chopped small
1 tbsp olive oil

Saute onions in oil for a minute or two. Add chicken and saute until chicken is cooked through. Then add…

2 cans great northern beans, drained and rinsed
2 cans green chili’s
40-48 oz chicken broth (5-6 cubes of chicken bouillon + 5-6 cups boiling water)
1 tsp cumin
1 tsp oregano
½ tsp white pepper (if you don’t have it, some finely ground black pepper is fine, but not as much)
¼ tsp cayenne (or to taste, if you want more, less, or none)
bit of nutmeg and cinnamon

Bring to a boil, then reduce heat and simmer for 30 minutes. I usually cover it so that too much of the liquid doesn’t evaporate (I like a lot of broth). Remove from the heat, and add…

1 cup sour cream
¾ cup whipping cream

Stir until heated through and sour cream is mostly incorporated. Sometimes it doesn’t fully incorporate right away, but it’s fine. Also, when you put it in the fridge, the cream and the water may separate. It looks a little weird, but it is just fine. Just mix it up again before you serve it for leftovers.

We like ours with a little kick, but if we are giving this to the kiddo, I don’t add the cayenne or too much pepper.

One last funny thing. I originally got this recipe about two years ago from a friend in our old ward. Then, the other day I was looking through the recipes on another food blog that I follow. She was talking about this white chicken chili that she absolutely loved, and provided the link for where she had gotten it (where they also showed where they found it). I followed it and, lo and behold, it’s my white bean chili recipe! Makes me wonder where the recipe actually started....

Friday, October 22, 2010

Salsa Chicken

There are a lot of versions of this online. I want to try to cite my sources, but when there are ten different ones that are exactly alike, I think I’ll be just fine.

This is not a glamorous or very exciting recipe, but it’s easy, yummy, and healthy. Plus, the kiddo likes it, too, which means it’s a keeper.

Salsa Chicken

cooking spray
2 chicken breasts
1 tbsp taco seasoning.
salsa
cheese
sour cream (optional)

First of all, the taco seasoning. Yes, it’s easier to buy it, but when I have everything I need in my cupboard, what’s the point? These are the spices that I use in place of taco seasoning. The next time I go to Winco, I’m going to get another spice container, make a bunch of this, and just have it labeled and on hand in my cupboard. (By the way, spices and herbs at winco are in bulk and they are DIRT CHEAP)
Preheat your oven to 375. Spray your pan with cooking spray. Sprinkle the taco seasoning on both sides of the chicken and place in the pan.
Don't judge the pan - it's been well-used =) Spoon over them as much salsa as you want. We like a lot of it. The chicken stays really moist this way.
 Bake for 25-35 minutes. Sprinkle cheese over the tops and put back in to melt. We like to serve this with sour cream, corn, and black beans and rice:
LOVE this stuff. It’s too pricey here in town, but at Winco it’s not too bad, and since this meal is pretty cheap, I feel okay getting it. Plus, it usually makes enough that I can make this whole meal again in a week, as “leftovers.”
I forgot to add the cheese last night, but it was good just the same. Doesn't look the greatest, but it is really really yummy. I promise.

Tuesday, October 19, 2010

Roasted Broccoli

I don’t really care for steamed broccoli. Never have. I’ll tolerate raw broccoli (with copious amounts of Chiz’s ranch dressing), and I like it in things like Chicken and Broccoli Alfredo, but steamed and by itself….no thanks. The problem is, it’s such a simple and easy way to serve a vegetable with dinner. Well, here is a great solution….

Roasting!

I love roasting just about any vegetable, and broccoli is no exception. There were a few recipes for it online that were all pretty similar, and I’ve made it so many times that I usually just wing it. It’s so simple and SO yummy.

Preheat to oven to 425 degrees.

Chop the broccoli into good size pieces - if it’s too small, it’ll get too burnt too quickly. Spray a cookie sheet, a casserole dish, whatever kind of pan you’d like, with cooking spray. Place the raw broccoli in/on it. It’s okay if the pan is pretty full - it’ll cook down a bit.
Shake on some salt and pepper, add a tsp or so of minced garlic, and drizzle with olive oil. Toss with a spoon. Place in the preheated oven and roast for 15-25 minutes.
Keep an eye on it while you are cooking the rest of your meal. Toss it with the spoon every five or ten minutes or so. You want the broccoli to caramelize, but not to burn.

This is best eaten right out of the oven. It can sit for a few minutes, but try to serve it right away. Right before serving, splash with a couple tbsp of lemon juice, and then sprinkle with parmesan cheese.
We served this alongside leftover mashed potatoes and Cornmeal-Crusted Tilapia (dip tilapia filets in an egg wash and then in cornmeal, seasoned with parmesan cheese and your favorites spices, then fry in pan coated with cooking spray). I coated the tilapia first and put it in the fridge, and then got the broccoli ready. While the broccoli was roasting I cooked the fish and reheated the mashed potatoes. Tilapia is a really good, affordable fish. Salmon is so good for you, but so expensive. And tilapia filets are huge! I usually can’t finish a whole one.

My pictures skills are really crappy, huh? I need some practice with food photography...

Monday, October 18, 2010

Blueberry Chutney, Grilled Chicken, and Couscous

Since they are pretty healthy, we occasionally like to grill marinated chicken breasts, but it’s really easy to get bored with them. This is a new recipe that I found online as a fun way to jazz up a simple chicken breast. It seems a little fancy, but it really isn’t.

I had some leftover dried apricots from making trail mix, and a half a bag of frozen blueberries that had been in the freezer forever, so I didn’t have to worry about spending a lot of money on this. (If you live near a Winco, or any other grocery store that sells things in bulk, go there! Things like spices, dried fruit, pasta, etc. are SOOO much cheaper there! It’s a lot easier to make fun and challenging recipes, since I can get many of the ingredients much cheaper than in a regular store.)

 Chicken Marinade:

½ cup white grape juice (original recipe calls for white wine - this is a great substitute!)
1 tbsp olive oil
1 tsp sugar
1 tsp dried thyme
bit of garlic powder and onion powder
salt and pepper

Marinate in the refrigerator at least 30 minutes, or until you are ready to grill. The longer, the better.


Blueberry Chutney

2 cups fresh or frozen blueberries
1/2 cup chopped dried apricots
1/3 cup packed brown sugar
1/3 cup finely chopped onion
3 tbsp cider vinegar
1 tsp ground ginger
1/2 tsp minced garlic
1/4 tsp ground coriander

Combine all ingredients in a medium sized saucepan. Bring to a boil, uncovered, and then reduce to a simmer. Simmer for 20-25 minutes, stirring every few minutes.

Cool to room temperature. To do this quickly, I fill my sink with ½ an inch cold water, and put the saucepan straight into it. It cooled off in about ten minutes while I went to get my hubby from school, and then I could use it as soon as I got home.

Put mixture into blender or food processor, add a couple tbsp water and process for a minute or so. If you want it thinner, add more water. Put back into saucepan and heat through.

For the most efficient timing, I prepared the marinade earlier in the day. I started on the chutney about an hour before we wanted to eat. After it was done and had cooled, I put the chicken on to grill (just on the stovetop). While the chicken grilled, I made the couscous (box kind that cooks in five minutes), blended the chutney, and heated it through.


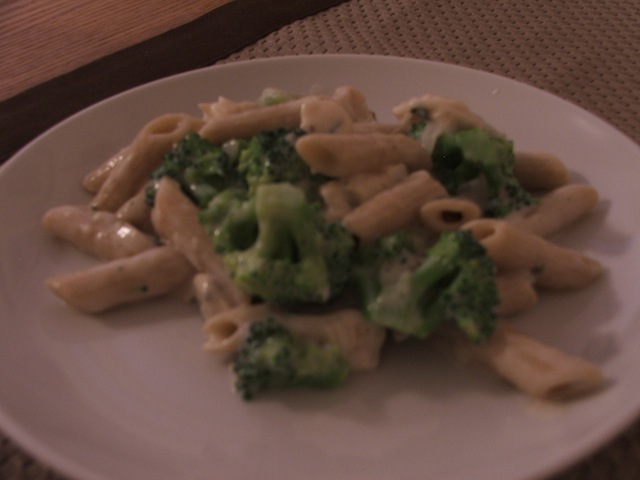
Serve the chicken on a bed of couscous, and put the chutney on top. We had it with a big spinach salad, since I couldn’t think of a vegetable to make with it in time. You could also serve it with rice, no problem, but I really liked the couscous with it. This isn't the prettiest picture - my camera skills aren't exactly up to par - but it looks great in real life, and tastes a lot better =)

And a bonus, the kiddo liked it too! I mixed some peas with some couscous, and just fed him pieces of chicken and chutney off of my plate, and he was a happy camper.

Saturday, October 16, 2010

Welcome!

In case you haven’t noticed, there are a lot of cooking blogs out there.

I don’t profess to be any sort of professional. My culinary philosophy consists of do-what-sounds-good-and-hope-it-works-out. Most of the recipes I use I have found on the internet, and I modify just about every recipe I ever use while I am using it.

I was blessed with a mother who taught me all of the essentials, as well as how to appreciate and understand good food. I was blessed with a father who taught me to enjoy exotic flavors, and that the sauce is the money. I was also blessed with a tolerant husband who can simultaneously act as food critic, garbage disposal, and cheerleader.

For me, cooking and eating is about enjoyment and fun. That being said, I have already had one child, and my eating habits and leftover baby weight have wreaked havoc on my body. I contemplated making this blog a “journey from fat to fit” type of blog. But that just held no excitement for me, nor do I think others really want to read about my constant, daily battles, trying to reconcile weight loss and enjoyable eating.

Bottom line: this is a cooking blog. Just your run-of-the-mill, stay-at-home-mom-turned-amateur-chef, fat-foodie-fights-fitness cooking blog. I hope you enjoy it and come back often. Please comment if you have thoughts - I would love to hear from every one of you, and any advice or help is welcomed. Until then, I’ll just be cooking, licking my fingers, washing my hands, cooking, licking my fingers, washing my hands, cooking, licking my fingers…..